Tuesday, September 23, 2014

Crispy Chicken Parmesan


Best Chicken Parmesan

Ingredients:
1 lb. pasta
Sauce
2 tablespoons extra-virgin olive oil
2 garlic cloves , minced
Kosher salt and pepper
1/4 teaspoon dried oregano
Pinch red pepper flakes
1(28-ounce) can crushed tomatoes
1/4 teaspoon sugar
2 tablespoons coarsely chopped fresh basil
Chicken
2 (6- to 8-ounce) boneless, skinless chicken breasts , trimmed, halved horizontally, and pounded 1/2 inch thick
1 teaspoon kosher salt
2 ounces whole-milk mozzarella cheese , shredded (1/2 cup)
2 ounces fontina cheese , shredded (1/2 cup)
1 large egg
1 tablespoon all-purpose flour
1 1/2 ounces Parmesan cheese , grated (3/4 cup)
1/2 cup panko bread crumbs
1/2 teaspoon garlic powder
1/4 teaspoon dried oregano
1/4 teaspoon pepper
1/3 cup vegetable oil
1/4 cup torn fresh basil

Instructions:
FOR THE PASTA:
Bring a large pot of water to a boil for pasta.  Boil pasta according to package instructions

FOR THE SAUCE:
1. Heat 1 tablespoon oil in medium saucepan over medium heat until just shimmering. Add garlic, ¾ teaspoon salt, oregano, and pepper flakes; cook, stirring occasionally, until fragrant (I find this happens very, very quickly, about 15 seconds). Stir in tomatoes and sugar; increase heat to high and bring to simmer. Reduce heat to medium-low and simmer until thickened, about 20 minutes. Off heat, stir in basil and remaining 1 tablespoon oil; season with salt and pepper to taste. Cover and keep warm. You will want to reserve 1/2 cup of the sauce to spoon over cutlets in the end; the rest will sauce the pasta.

NOTE:  As I've said many times before, we are HUGE fans of Don Pepino Pizza Sauce.  It comes in a yellow can and is magicalIf you don't want to make the sauce, use a can or two of Don Pepino.  You won't be sorry!

FOR THE CHICKEN:
2. Sprinkle each side of each cutlet with 1/8 teaspoon salt and let stand at room temperature for 20 minutes. Combine mozzarella and fontina in bowl; set aside.
3. Adjust oven rack 4 inches from broiler element (this is the top rack in my oven) and heat broiler. Whisk egg and flour together in shallow dish or pie plate until smooth. Toss together Parmesan, panko, garlic powder, oregano, and pepper in second shallow dish or pie plate. Pat chicken dry with paper towels. Dredge cutlets, one at a time, in egg mixture, allowing excess to drip off. Coat all sides in Parmesan mixture, pressing gently so crumbs adhere. Transfer cutlet to large plate and repeat with remaining cutlets.
4. Add 2 tablespoons salt to boiling pasta water, cook, and drain pasta.
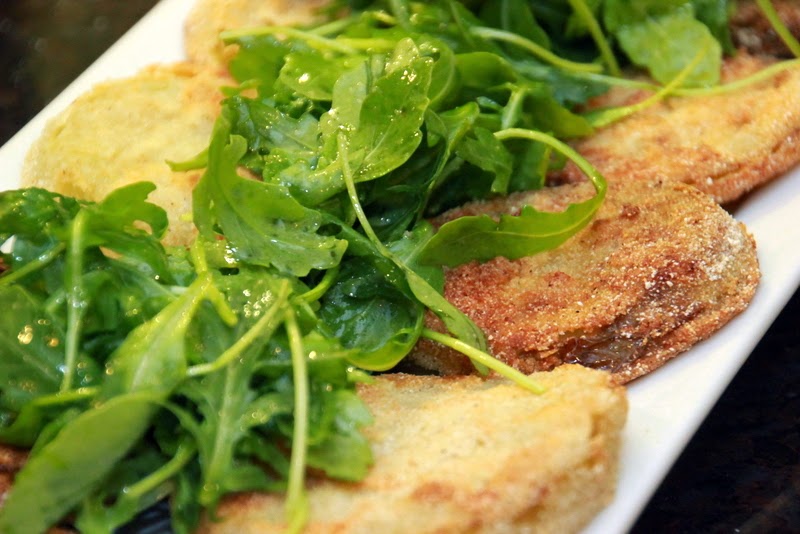
5. Heat vegetable oil in 10-inch nonstick skillet over medium-high heat until shimmering. Carefully place 2 cutlets in skillet and cook without moving them until bottoms are crispy and deep golden brown, 1½ to 2 minutes. Using tongs, carefully flip cutlets and cook on second side until deep golden brown, 1½ to 2 minutes. Transfer cutlets to paper towel–lined plate and repeat with remaining cutlets.
6. Place cutlets on rimmed baking sheet and sprinkle cheese mixture evenly over cutlets, covering as much surface area as possible. Broil until cheese is melted and beginning to brown, 2 to 4 minutes, rotating baking sheet as necessary for even browning. Transfer chicken to serving platter and top each cutlet with 2 tablespoons sauce. Sprinkle with basil and serve immediately with sauced pasta.


There is an ATK video that shows you all the steps, which is wonderful:
ATK Chicken Parm Video


Wednesday, September 10, 2014

Fried Green Tomatoes with Arugula Lime Salad


What do you do when your amazing father-in-law arrives at your doorstep with a case of large, perfect, farm green tomatoes?  YOU MAKE FRIED GREEN TOMATOES, OF COURSE!  We had tried making these once before and they were not so hot - the coating burned and/or fell off.   This recipe corrects for that with the perfect combination of cornmeal and flour in the coating, and most importantly removes all the liquid from the tomatoes before cooking.

We were eating this with blackened tuna with mango salsa. In an attempt to lighten up the tomatoes and add some freshness, we added arugula salad.  It turned out to be the perfect combination of salty and fresh.

Since we still have MANY more green tomatoes left, stay tuned for more Adventures of the Green Tomatoes!

Ingredients

  • 1.5 lbs green tomatoes, sliced 1/4 inch thick
  • 2/3 cup cornmeal
  • 1/3 cup all-purpose flour 
  • 1 1/2 tsp salt
  • 1/2  tsp pepper
  • 1/8 tsp cayenne pepper
  • 2/3 cup buttermilk
  • 1 large egg
  • 2 cups peanut, vegetable, or canola oil

Directions:

  1. Line a rimmed backing sheet with paper towels.  Place tomato slices on top and cover with another lay of paper towels.  Let sit for 20 minutes.  Press forcefully on tomatoes to get all the moisture out.
  2. Process 1/3 cup of the cornmeal in a food processor until very finely ground (about 1-2 minutes). Combine processed cornmeal with the rest of the dry ingredients - remaining cornmeal, flour, salt, pepper, and cayenne pepper in a show dish.  Mix well.  
  3. Whisk buttermilk and egg together in a shallow dish.
  4. Dip each tomato slice in the buttermilk mixture and then dredge in cornmeal mixture, pressing firmly to adhere.  Transfer to clean backing sheet or plate.  Prepare another backing sheet with wire rack to use for 
  5. Heat oil in a 12 inch skillet over medium-high heat until 350 degrees.  Fry tomato slices in batches. Fry each tomato 2-3 minutes per side, until golden brown.  Then transfer to wire rack.  Bring oil back to 350 and fry remaining tomatoes.
  6. Serve! Or Top with Arugula Salad like we did and then Serve!
** We felt like the fried tomatoes needed some freshness and acid to brighten them up.  So, we topped them with a simple arugula salad consisting of arugula and lime dressing. Mr S. whipped up a quick and tasty lime dressing:  

1/4 cup olive oil
3 tablespoons lime juice
1/16 tsp garlic powder
1/8 tsp onion powder
1/8 tsp black pepper
1/8 tsp salt (more to taste)


Blackened Tuna

A couple months ago, we posted the recipe for blackened grilled mahi mahi with mango salsa.  Two nights ago, we made Blackened Tuna with the same salsa.  In our opinion, it was way better than the mahi mahi.  We posted the picture on social media and a few people asked for the recipe.  So, here's a short recipe.

Refer to Blackened Mahi to get the recipe for the mango salsa and the recipe for the blackening seasoning. When we made the blackened Mahi, we used a grill pan.  While that was fine, we definitely now believe that blackened anything is better done in a skillet.

We have discovered that Sam's Club has great prices on wild tuna steaks.  They sell it in a pre-portioned bag with each piece individually frozen.  It's perfect when cooking for a group of any size because you can take out the exact amount you need, and don't end up wasting anything.

Ingredients:
Tuna Steaks (ours were  1/2 inch thick)
Blackening Seasoning
Mango Salsa
2-4 tablespoons Canola or Vegetable oil

Directions:
Rub fish generously on all sides with the blackened seasoning.  Let sit for 10-15 minutes.

Heat stainless skillet to medium high. Add 2 tablespoons of oil and heat until oil start to shimmer.  Add tuna steaks to the skillet and cook for 2-3 minutes. Flip the Steaks and cook for another 1-2 minutes.

Top with mango salsa and serve immediately.  We didn't have any peppers, so our salsa consisted of just mango, cucumber, and onion, and it was still delicious.  Something I have learned from Mr. S (who is amazing at utilizing the ingredients we have) - if you don't have everything, improvise!  Turns out, some of our best recipes have actually come about that way.

NOTE:  The cooking time is HIGHLY dependent on desired doneness and the thickness of the fish you are using.  We cooked ours about 2.5 minutes on the first side and another min on the second for a medium done tuna.  Next time, we will probably cook it a little less.

Last, but certainly not least:  I have to give a shout out to Mr. S!  Didn't he take some amazing shots of our food???  After a whirlwind year and a half of engagement, marriage, honeymooning, and settling into our lives and newlyweds, we have finally returned to one of our favorite mutual hobbies (besides cooking of course), photography!  More photos to come from Mr. and Mrs. S!


Friday, September 5, 2014

The ONLY Sunny Side Up Eggs Recipe You Will Ever Need


Mr. S. and I are absolutely fans of breakfast.  We used to go out for breakfast on the weekends often (and sometimes still do). But over the past year, we've accumulated so many go-to recipes for breakfast classics, that it often makes more sense to stay home - from the wallet standpoint, the knowing what's in our food standpoint, and the taste standpoint!


Several months ago, we stumbled upon this America's Test Kitchen recipe for sunny-side-up eggs/fried eggs, and let me tell you my friends, it has been life-changing.  We discovered that you can make PERFECTLY cooked, PERFECTLY runny (depending on preference) fried eggs in about 2 minutes.  Once you try this recipe, you will never go back to the  insanity of trying to get the yellow of the egg done without overcooking the white!

Perfect Sunny Side Up Eggs (serves 2 - with 2 eggs each)

Ingredients
2 tsp canola (or vegetable) oil
4 large eggs
Salt and pepper
2 tsp unsalted butter

Directions:
  • Heat oil in 12-inch nonstick skillet on low for 5 minutes.  
  • Crack 2 eggs into a mug or small bowl.  Crack the other two eggs into a separate bowl/mug.  Season with salt and pepper
  • Increase heat to medium-high until oil is shimmering.  Add butter and swirl to coat pan. 
  • Simultaneously pour both bowls of eggs into the pan.
  • Cover and let cook for 1 minute.  
  • Remove skillet from the burner and let stand, covered 15 to 60 second, depending on preferred doneness (we do 30 seconds for perfectly runny eggs).


Source:  America's Test Kitchen