Monday, July 27, 2015

Basil Grilled Tuna Steaks


We have been doing A LOT of grilled lately.  While our usual steaks, chicken, and grilled veggies were great, we were looking for something a little different.  This recipe is full of flavor, healthy, and ready quickly!  We can across it on an episode of Primal Grill, one of Mr. S's favorite cooking shows.  The host is admittedly a little odd, but his recipes are amazing!  We like our tuna rare to medium rare (hence the pinkness in the photos).  Cook it to your likeness.  

Ingredients: 

4 tuna steaks (3/4 inch to 1 inch thick; 6 to 8 ounces each)
1 bunch fresh basil, washed and stemmed (about 1-1.5 cups loosely packed)
4 cloves garlic, cut in half
3 strips lemon zest
Juice of 1 lemon (3 to 4 tablespoons)
1 tablespoon white vinegar
1 cup extra-virgin olive oil
1 teaspoon coarse salt
1 teaspoon black pepper


Directions: 

Trim any skin or dark or bloody spots off the tuna,. Rinse the tuna under cold running water and blot dry with paper towels.

Combine the basil, garlic, lemon zest, lemon juice, vinegar, oil, salt, and pepper in a food processor or blender and puree until smooth. Pour this mixture over the tuna and let marinate in the refrigerator, covered, for 30 minutes to 2 hours, turning the tuna steaks several times.  We put the tuna and marinade in a ziploc bag, because it makes for easy disposal.  But, a baking dish or bowl would work too.

Set up the grill for direct grilling and preheat to high. Oil the grill grates with canola oil. Drain the tuna steaks and arrange on the grill. Grill until cooked to taste, 2 to 3 minutes per side for rare, 4 to 6 minutes per side for medium, (If you are a fancy griller, like Mr. S., rotate the steaks 45 degrees after 2 minutes to create grill marks). The steaks should be nicely browned on the outside.  Transfer the steaks to plates or a platter and let rest for 3 minutes.  Serve.


Source: Primal Grill TV Show

Friday, July 17, 2015

Lemon Dill Green Bean Salad

It has been a long time since we have blogged, sadly.  The past few months have been full of new jobs, happy events, and lots of time gardening.  We have still been cooking up a storm, but unfortunately haven't been very good at documenting it. 

But, last night's very healthy, super tasty, extraordinarily easy dinner was just too good not to share.  The majority of our meals lately, like last night's, consist of fresh homegrown or local produce and grilled chicken/beef/shrimp.  I created this salad last year and resurrected it for my mom's 70th birthday party this past weekend.  It's so fresh, bursting with flavor, and is truly the perfect summer salad.  We perfected this red wine vinaigrette quite a while back, and it is our go to summer dressing.  We make a batch at the beginning of every week to eat on salads.  It has appeared on the blog before with orzo salad.

Green Bean Salad with Red Wine Vinaigrette

Ingredients
  • 1 lb green beans, trimmed
  • 1 cup sliced grape/cherry tomatoes (colorful mixes look beautiful)
  • 1/4 of a small red onion, sliced finely 
  • 4 Tbsp. finely chopped fresh dill
  • 1/4 c red wine vinaigrette (recipe HERE) 
  • 1/4 cup crumbled feta (optional)
  1. Blanch green beans.  Bring a pot of water to a boil.  Fill a large bowl with ice water and set aside.  Drop the beans into the boiling water.  Boil for 2-4 minutes depending on your preference for crispiness.  Take beans out immediately and place directly into ice water to stop the cooking process.  Leave in water for 1-2 minutes until chilled.  Remove and dry beans with a paper towel.
  2. Place green beans, tomatoes, onions, and dill in a large bowl.  Toss with 1/4 cup vinaigrette.  All salad to sit for at least 15 minutes before serving. Add extra salt and pepper to taste.
  3. Serve with lemon wedges for extra acid and crumbled feta cheese.


Thursday, March 26, 2015

Zucchini Fritters (Kolokithokeftedes)

Zucchini fritters, or kolokithokeftedes in Greek, are something that Mr. S and I have been familiar with since we were children.  Our Yiayias (grandmothers) used to make them and they are a very common appetizer found in the tavernas of Greece and the Greek islands.  They are a delicious and pretty healthy way to consume lots of zucchini and perfect for kids who aren't too keen on vegetables.  Oh, and they are perfect for vegetarians and lent!

Zucchini Fritters

  • 2 1/2 pounds zucchini, grated (about 4-4 1/2 cups prior to draining)
  • 1 1/2 teaspoon salt (+ 1/2 tsp to add to mixture)
  • 1/2 tsp ground black pepper
  • 1/2 cup all-purpose flour
  • 1/4 cup grated Parmesan
  • 3-4 Tbsp of freshly chopped dill
  • 2 cloves garlic, minced 
  • 1 large egg, beaten
  • 2-3 Tbsp canola oil
Grate zucchini and place in a colander over the sink or a large bowl.  Toss with salt and allow to sit for 10-15 minutes to drain.  Squeeze zucchini in colander to get out as much water as possible.  Then place zucchini in cheesecloth to drain as much water as possible. Then place the zucchini in a large bowl.  NOTE:  This step is extremely important.  If you do not get the water out, the fritters will fall apart and won't brown in the pan.  It might make it easier to work in batches, draining a cup or so at a time.  A clean kitchen towel can be used if you don't have cheesecloth.

Add flour, Parmesan, garlic, dill, 1/2 tsp salt, pepper, and egg to the zucchini and toss to combine.

Heat canola oil in a large non-stick skillet over medium high heat.  Working in batches, spoon 2 tablespoons of the mixture into the pan to make each fritter and flatten the fritters with a spatula. Cook about 2-3 minutes until golden brown, flip then  cook an additional 2 minutes.  NOTE:  Adjust the temperature between medium and medium high so that the fritters won't burn.  You want them to be gold brown and want the inside to cool sufficiently without burning.

Place on a cooling rack while cooking the other batches.  Serve alone or with tzatziki sauce.


Adapted from Damn Delicious.

Tuesday, March 3, 2015

B.A.L.T.

Our town of Baltimore is a fish/seafood lover's dream.  Baltimoreans know fresh seafood and as a recent transplant to the city, I can tell you, they are often snooty about it!   But, it's a small price to pay to enjoy some of the delicious local fish and seafood dishes available.  Baltimore is most famous for the crabcake sandwich, but this new creation might be our favorite.

INTRODUCING.....

The B.A.L.T. - Bacon, Avacado, Lettuce and Tuna (blackened) + Tomato optional

Many months ago, we created our own version of blacking seasoning and have since used it on many kinds of fish.  We featured two of these recipes on this blog, both with mango salsa - Blackened Tuna and Blackened Mahi.  But this sandwich, takes those flavors to another level.  After all, isn't everything better with bacon?!

B.A.L.T. (makes 4 sandwiches)
4 (4-6oz) Tuna Steaks (we buy wild frozen tuna steaks from Sam's Club)
2-3 Tbsp of homemade Blackening Seasoning 
4 pieces of romaine lettuce
4 slices of bacon (8 if you are a bacon lover)
1 large (or 2 small) avacados
1 large tomato cut into slices (optional)
4 brioche rolls, toasted

Wasabi Citrus Aioli (McCormick Recipe)
1/2 cup mayonnaise
3/4 Tbsp Paprika 
3/4 tsp wasabi powder (reduce for less heat, we put 1/2 tsp)
1/4 tsp finely grated lemon peel
1/4 tsp finely grated lime peel
3/4 tsp fresh lemon juice
3/4 tsp freshly grated lime peel
1/2 clove garlic minced OR 1/4 tsp garlic powder

Rub fish generously on all sides with the blackened seasoning.  Let sit for 10-15 minutes or more.

To make the wasabi citris aioli, combine all ingredients in a small bowl and whisk until well combined.  Let sit in the refrigerator until you are ready to put the sandwich together.

Slice avocado, tomato (if desired), and lettuce and set aside.

Cook the bacon in a pan (or microwave or oven) to desired crispiness.   We cooked ours for 3 minutes between paper towels in the microwave and then cooked it in a non-stick frying pan for 1.5  additional minutes on each side.

Toast the brioche buns.  This can either be done in the toaster oven, or the buns can be placed in the bacon pan for 1-2 minutes on either side to get the flavor of the bacon drippings.

Heat stainless skillet to medium high.  Add 2 Tablespoons of canola oil and heat until oil starts to shimmer.  Add tuna steaks to skillet and cook for 2-3 minutes.  Flip and cook another 1-2 minutes.  NOTE:  The cooking time is HIGHLY dependent on your desired tuna doneness and the thickness of the fish you are using.  We cooked ours about 2 minutes on the first side and 1.5 minutes on the second side for a medium rare.

Put about a tablespoon (more if desired) of aioli on the bottom of each roll.  Then place the blackened tuna steak on the roll and top with avocado, tomato, bacon, and lettuce.  Serve immediately.  We served ours with a mixed green salad topped with the sandwich toppings - tomato, avocado, bacon, and even a small slice of blackened tuna.


Friday, February 27, 2015

Asian Scallop Pancakes


Way before I was in his life, Mr. S. was a foodie and a fan of Jacques Pepin. While I loved to cook before we met, I hadn't watched many cooking shows and knew very little about the art of food presentation. He has taught me a lot over the past 3.5 years, and we have learned a lot together, particularly from watching some of our favorites - America's Test Kitchen, Jacques Pepin, and even Chopped.

The other night, we watched a DVRed episode of Jacques Pepin in which he made Scallop Pancake served on a Boston bibb lettuces salad. I have to admit, I thought it was a little odd and certainly questioned the potential deliciousness. But, Mr. S was very enthusiastic about it and I knew it would make him happy to give it a whirl. After all, over the course of our relationship, he has put up with a lot of food quirks on my part - mainly my deep hatred for condiments, particularly white ones - that means no mayo, cream cheese, sour cream, relish, and (perhaps the worst) mustard. So, the least I could do is try to make scallop pancakes. I did a little research and found that they are an popular Asian appetizer. From the first bite, I quickly realized that I had completely underestimated the magazines of these simple treat. They are delicious!

Pancakes

1/4 pound scallops, rinsed under cold water (we used small ones)
1/2 cup all-purpose flour
1/4 teaspoon baking powder
1 1/3 cups club soda
1/4 teaspoon salt
1/4 teaspoon freshly ground black pepper
1 tablespoon minced scallions (or chives)
About 2-3Tbsp canola oil (Jacques used peanut oil, but we didn't have that) for pan frying

Put the scallops, flour, baking powder, club soda, salt, and pepper in a blender or food processor and process until smooth. Stir in the scallions.

Heat about 1 1/2 tablespoons of the oil in a large nonstick skillet over medium-high heat. Spoon about 1 1/2 tablespoons batter per pancake into the pan. It will spread to form a disk about 3 1/2 inches in diameter. Cook about 6 pancakes at a time over medium heat for a total of about 5 minutes, turning them after about 2 1/2 minutes. (NOTE: Turn the heat down or reduce cooking time as necessary - make sure they don't burn). Repeat with the remaining 1 1/2 tablespoons oil and the remaining batter to make about 12 pancakes total. Transfer to a wire rack to cool for a minute before serving. DO NOT put on a paper towel. They will get soggy!

Serve alone or on a bed of lettuce.  Enjoy!

Romaine Salad

2–3 cups torn lettuce, washed and dried
1 tablespoon extra-virgin olive oil
1 1/2 teaspoons fresh lemon juice
Dash each salt and freshly ground black pepper
Toss the lettuce with the olive oil, lemon juice, and salt and pepper in a medium bowl. To serve, divide the salad among four plates, arrange 3 pancakes alongside or on top of the greens, and serve.


Source: Jacques Pepin Episode 212

Friday, January 23, 2015

Chicken Cordon Bleu with Prosciutto


As I said in our last post, after our St. Martin vacation, Mr. S and I have a renewed interest for a little French flair in our cooking. In St. Martin, we often saw chicken cordon bleu on the menu, but since we were in the Caribbean, we definitely gravitated towards fresh seafood at most meals. But, ever since, I've been wanting to dig up my mom's old recipe. As a child, my mom used to make chicken cordon bleu and it was always one of my favorites.  She had found the recipe in an old cookbook and over the years had made a number of tweaks.  I took her tweaked recipe and we made some of our own.

Two of the main tweaks we made to this recipe were using prosciutto instead of ham, and adding fresh sage both inside and to the top.

Chicken Cordon Bleu 
Ingredients
4 chicken breasts
8 pieces of prosciutto
20 fresh sage leaves
1 cup of all purpose flour
1 tsp poultry seasoning
1/2 Tbsp of canola or vegetable oil
8-16 oz of mozzarella cheese, cut into 1/2 inch thick slices or cubes (depending on how much cheese you prefer)
1-2 lemons
salt and pepper to taste

Instructions
1.  Preheat over to 375
2.  Mix flour, poultry seasoning, salt and pepper in a shallow dish.
3.  Fill a glass backing dish with 1/2 inch of water, squeeze 1/2 a lemon in the water.
4.  Place the prosciutto in a skillet with a tad of oil and fry it for 1-2 minutes to get it a little browned.
5.  Pound the chicken breasts with a mallet until about 1/2 inch thick. (We usually put ours in a open plastic bag so the juices don't get everywhere and we don't ruin the meat.
6. Dredge chicken breasts in flour, covering both sides of them.
7. Place 2 slices of prosciutto and 3 sage leaves on one half of each chicken breast.  Then fold the rest of the chicken breast over.


8.  Heat oil in non-stick skillet on medium high heat until shimmering.  Add chicken breasts and cook on one side until golden brown, about 3-4 minutes. (Turn heat down if necessary to avoid burning). Flip the chicken breasts over and cook on the other side until browned. (Chicken should NOT be cooked through).
9. Place the browned chicken breasts in glass baking dish.  Open each chicken breasts and put in mozzarella cheese.
10.  Squeeze the remaining lemon on the chicken breasts.  If you really like lemon like us, you can squeeze another 1/2 or even a whole lemon on top!
11. Place the chicken in the oven and bake until the chicken is cooked through, 25-30 minutes depending on the thickness of the chicken.  IMPORTANT:  As the chicken is cooking use a baster to suck up the liquid and baste the chicken breasts while they cook.  Do this often and the chicken will end up very tender, otherwise it could get dry.  I did this 3-4 times every five minutes while it was cooking and a bunch times after we pulled it out of the oven.


Wednesday, January 21, 2015

Cooking BEYOND the first year of marriage!

My gosh, it has been WAY too long since we wrote an entry into this blog.  The fall was packed full of weddings, joyous occasions, and fun.  While we wouldn't trade that for the world, it left little time for blogging.  As you will notice...the title of our blog has changed to include .....and BEYOND.  We hope to blog even more in 2015.


Since we last wrote, Mr. S and I celebrated our first anniversary on 1.4.15.  We spent the day and the 10 days surrounding it in the tropical paradise of St. Martin enjoying turquoise waters and lots of French food.  Yes, I said FRENCH food.   If you are a foodie like us and have never been to St. Martin, definitely add it to your bucket list.  Half of the island is French - meaning language, food, and culture is extraordinarily pervasive.  Fresh baguettes, Fine french wines, and gourmet food abounds, particularly in the gorgeous seaside town of Grand Case.  It was by far one of our favorite dining spots on the island and we visited many times over our 10 day visit. Mr. S has been interested in French cooking for quite sometime and our time in St. Martin piqued my interest too.  We were so inspired by the gorgeous presentation and delicious food and hoping to take a French cooking class sometime this year! 

 Anniversary Meal - Fish and Seafood tasting menu at Le Pressoir in Grand Case.


Sunset in Grand Case


Thursday, October 9, 2014

Chicken Satay Chopped Salad


With Thai Butternut Soup simmering on the stove top, and the smell of curry, lime, and thai basil filling our house, we wanted to find a salad to compliment the soup.  After looking through many recipes online, but not finding anything quite right, we decided to concoct our own, using elements of recipes we'd seen.  Below, is what we came up with, a salad with a skewer of chicken satay, and a sesame lime dressing.  This could definitely be a meal on it's own, but, combined with the butternut soup, made a fantastic soup and salad dinner combo.

Ingredients

Chicken Satay
1/2 can of coconut milk
zest from 1 lime
1/4 cup peanut butter
2 tsp minced garlic
2 tsp minced ginger
1/2 tablespoon soy sauce
1 tablespoon sweet thai chili sauce
1 pound chicken breasts, cut into one inch pieces
wooden skewers 

Salad
2 cups organic baby mixed field greens
1 cup chopped cabbage (purple is great for color)
1/2 small red onion finely sliced
2 carrots chopped
1 red pepper, chopped
2 cucumbers, chopped
3-4 tablespoons of fresh chopped thai herbs - we used thai basil and cilantro
1/4 cup peanuts, chopped/crushed

Dressing
3 tablespoons lime juice
2 tablespoons fish sauce
1 tablespoon brown sugar
1 tablespoon chopped cilantro
1 teaspoon sesame oil
1/2 inch piece of ginger, grated
1/2 clove of garlic, minced
Sriracha or red paper flakes to taste (optional)

Directions:
Make marinade for the chicken satay (coconut milk, lime zest, garlic, ginger, soy sauce, and sweet thai chili).  Mix well.  Add chicken pieces and marinate for at least 30 minutes, 1-2 hours if possible.  Place marinated chicken pieces on wooden skewers and grill until cooked through.  Be sure to oil your grill grates and watch chicken carefully, as it has a tendency to stick.

Combine ingredients for the dressing in a small food processor.

Mix the cabbage and field greens together to form the base of the salad.  For beautiful presentation,  arrange the colorful chopped vegetables in sections around the salad.  Add peanuts and fresh herbs.  Put the skewers of chicken satay on top.

Serve with dressing, extra peanuts, lime wedges and cilantro.  Or like us, serve a small salad with the bowl of thai butternut soup!


Wednesday, October 8, 2014

Thai Butternut Squash, Sweet Potato, Carrot Soup

Fall is, by far, our favorite time of the year - cool weather, nights by the fire pit, apple cider, and the beginning of fall/winter comfort food.  Butternut squash soup has always been a fall favorite of mine, and when Mr. S brought home some butternut squash from a local farm, I knew I had to make some.  As much as I love traditional butternut soup with cinnamon and nutmeg, we wanted to try something new!  A long time ago, I came across a recipe for Thai Butternut Soup on Pinterest, and have been waiting for butternut season to give it a whirl.  I'm not sure what we were expecting, exactly, but we couldn't get over how delicious this recipe turned out.  Not only was it super flavorful, it was healthy, filling, and beautiful! 

Thai Butternut Squash, Sweet Potato, Carrot Soup

Ingredients:
  • 2 tablespoons olive oil (can use coconut or canola)
  • 1 sweet onion, diced
  • 1/4 cup Thai Kitchen red curry paste (more at the end to taste)
  • 1/4 teaspoon red pepper flakes (optional)
  • 1 tablespoon freshly grated ginger
  • 5 garlic cloves, minced
  • 6-7 cups uncooked butternut squash, peeled, cut into 1”cubes, seeds separated
  • 1 large sweet potato, peeled, cut into 1”cubes
  • 3 medium carrots, peeled and chopped
  • 4 cups chicken or vegetable stock
  • 1 teaspoon salt
  • 1/2 teaspoon pepper
  • 1 (14 oz.) can Thai Kitchen coconut milk (we used light)
  • 2 tablespoons fish sauce
  • 1 tablespoon finely chopped Thai basic
  • 2 tablespoons lime juice
  • Sriracha/Asian hot chili sauce to taste (optional)

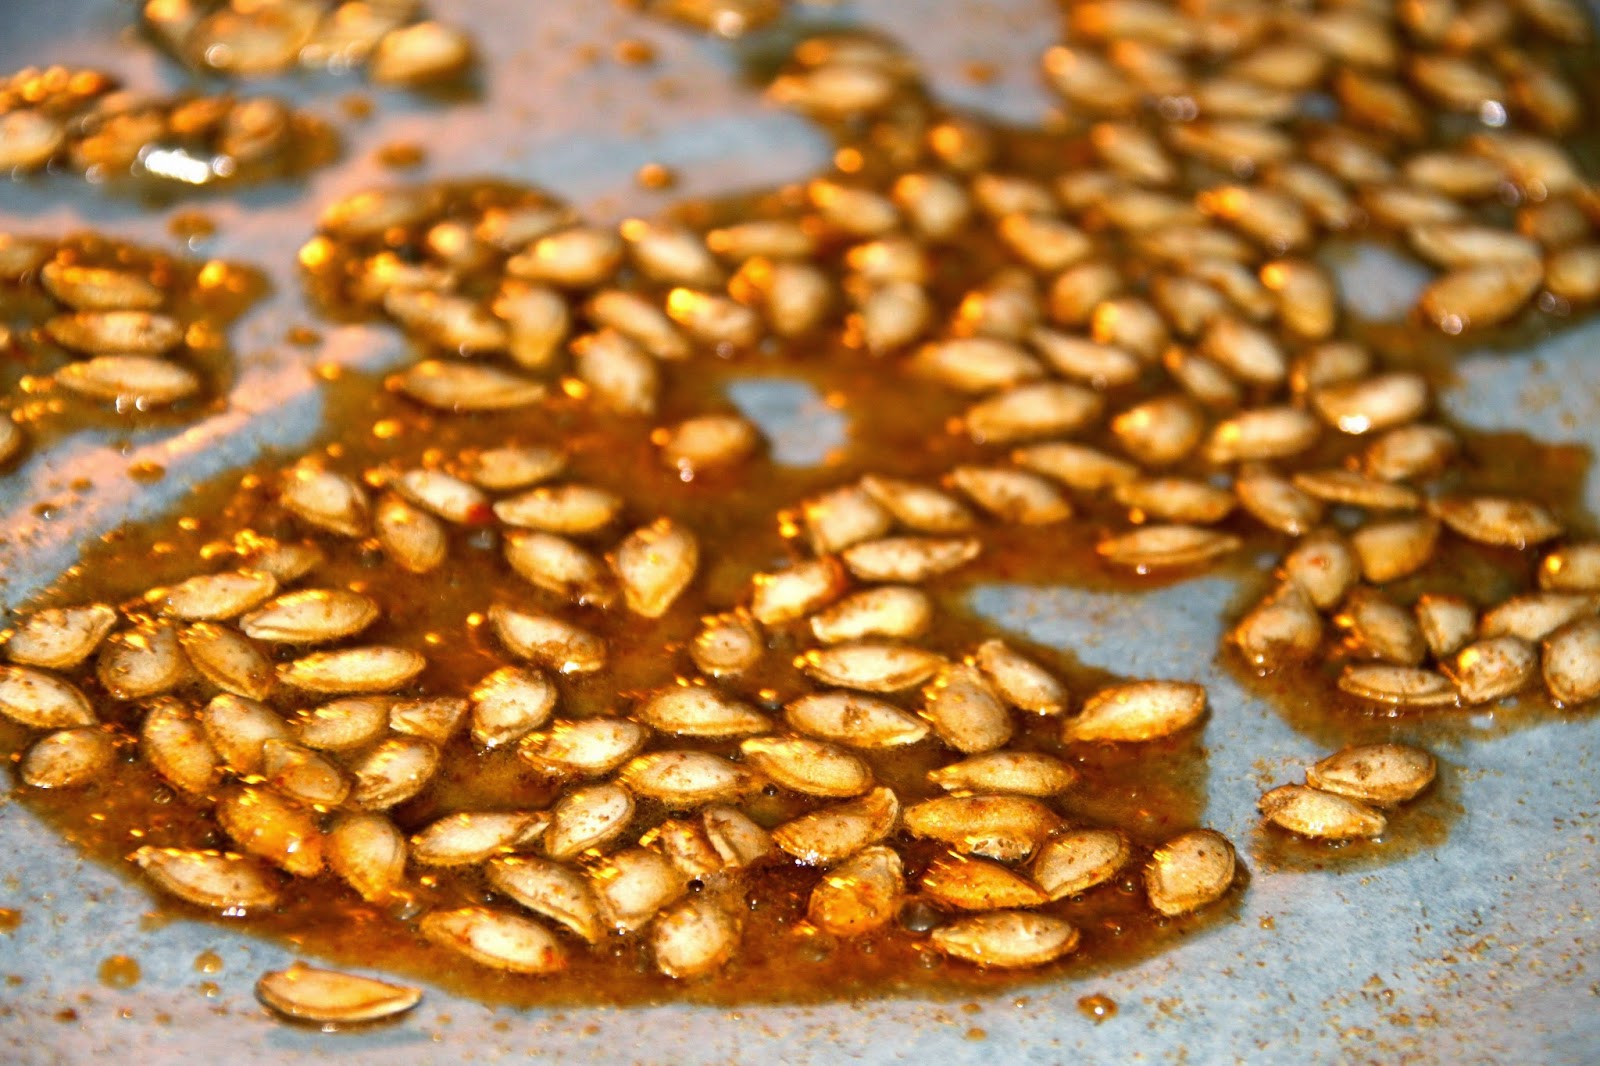
    Honey Sriracha Butternut Squash Seeds
  • Reserved butternut squash seeds
  • 1 tablespoon honey
  • 1/2 teaspoon coconut oil
  • 1/2 teaspoon Sriracha/Asian hot chili sauce
  • 1/2 teaspoon salt
  • 1/4 teaspoon McCormick ground cumin

    Garnish
  • Freshly squeezed lime juice
  • 1/2 cup cilantro, roughly chopped (optional)
  • Sriacha hot chili sauce
Directions:
  1. Preheat oven to 300 degrees. Line a baking tray with parchment paper. Rinse squash seeds and pat dry. In a small bowl, whisk together honey, Srirach, oil, salt, and cumin; add seeds and stir until evenly coated. Spread seeds out evenly on baking sheet in a single layer. Cook for 15-20 min (watch closely so they won't burn).
  2. Meanwhile, heat oil over medium heat in a dutch oven. When oil is hot, add, onions and sauté until onions are soft, about 3 - 5 minutes. Add red curry paste, red pepper flakes, ginger and garlic; stir to combine with onions; saute for 3 minutes. Add squash, sweet potatoes, carrots and chicken stock. Season with 1 teaspoon salt, and ½ teaspoon pepper. Bring to a boil, cover, then reduce heat to medium. Simmer for 15-20 minutes or until vegetables are soft.
  3. Pour  vegetable mixture into blender/food processor (you will have to do this in batches unless you have a giant blender). Puree soup in batches until it is smooth.   Return to pot, or to a new pot.  *** Make sure that your blender is properly vented so it doesn't explode from the heat ***
  4. Add coconut milk, fish sauce, and basil to the soup and cook until soup is heated through (2-5 minutes). When ready to server, stir in 2 tablespoons lime juice. Taste soup and add desired amount of Sriracha, salt and pepper to taste.
  5. To serve, squeeze fresh lime juice onto individual bowls for a fresh pop and garnish with roasted seeds and cilantro.

This soup is very filling.  So, a couple bowls could be a meal by itself.  But, to up the freshness factor, we decided to have it with a thai chopped salad!  Recipe to follow to soon :)


Adapted from the fabulous Carlsbad Cravings blog!

Tuesday, September 23, 2014

Crispy Chicken Parmesan


Best Chicken Parmesan

Ingredients:
1 lb. pasta
Sauce
2 tablespoons extra-virgin olive oil
2 garlic cloves , minced
Kosher salt and pepper
1/4 teaspoon dried oregano
Pinch red pepper flakes
1(28-ounce) can crushed tomatoes
1/4 teaspoon sugar
2 tablespoons coarsely chopped fresh basil
Chicken
2 (6- to 8-ounce) boneless, skinless chicken breasts , trimmed, halved horizontally, and pounded 1/2 inch thick
1 teaspoon kosher salt
2 ounces whole-milk mozzarella cheese , shredded (1/2 cup)
2 ounces fontina cheese , shredded (1/2 cup)
1 large egg
1 tablespoon all-purpose flour
1 1/2 ounces Parmesan cheese , grated (3/4 cup)
1/2 cup panko bread crumbs
1/2 teaspoon garlic powder
1/4 teaspoon dried oregano
1/4 teaspoon pepper
1/3 cup vegetable oil
1/4 cup torn fresh basil

Instructions:
FOR THE PASTA:
Bring a large pot of water to a boil for pasta.  Boil pasta according to package instructions

FOR THE SAUCE:
1. Heat 1 tablespoon oil in medium saucepan over medium heat until just shimmering. Add garlic, ¾ teaspoon salt, oregano, and pepper flakes; cook, stirring occasionally, until fragrant (I find this happens very, very quickly, about 15 seconds). Stir in tomatoes and sugar; increase heat to high and bring to simmer. Reduce heat to medium-low and simmer until thickened, about 20 minutes. Off heat, stir in basil and remaining 1 tablespoon oil; season with salt and pepper to taste. Cover and keep warm. You will want to reserve 1/2 cup of the sauce to spoon over cutlets in the end; the rest will sauce the pasta.

NOTE:  As I've said many times before, we are HUGE fans of Don Pepino Pizza Sauce.  It comes in a yellow can and is magical!  If you don't want to make the sauce, use a can or two of Don Pepino.  You won't be sorry!

FOR THE CHICKEN:
2. Sprinkle each side of each cutlet with 1/8 teaspoon salt and let stand at room temperature for 20 minutes. Combine mozzarella and fontina in bowl; set aside.
3. Adjust oven rack 4 inches from broiler element (this is the top rack in my oven) and heat broiler. Whisk egg and flour together in shallow dish or pie plate until smooth. Toss together Parmesan, panko, garlic powder, oregano, and pepper in second shallow dish or pie plate. Pat chicken dry with paper towels. Dredge cutlets, one at a time, in egg mixture, allowing excess to drip off. Coat all sides in Parmesan mixture, pressing gently so crumbs adhere. Transfer cutlet to large plate and repeat with remaining cutlets.
4. Add 2 tablespoons salt to boiling pasta water, cook, and drain pasta.
5. Heat vegetable oil in 10-inch nonstick skillet over medium-high heat until shimmering. Carefully place 2 cutlets in skillet and cook without moving them until bottoms are crispy and deep golden brown, 1½ to 2 minutes. Using tongs, carefully flip cutlets and cook on second side until deep golden brown, 1½ to 2 minutes. Transfer cutlets to paper towel–lined plate and repeat with remaining cutlets.
6. Place cutlets on rimmed baking sheet and sprinkle cheese mixture evenly over cutlets, covering as much surface area as possible. Broil until cheese is melted and beginning to brown, 2 to 4 minutes, rotating baking sheet as necessary for even browning. Transfer chicken to serving platter and top each cutlet with 2 tablespoons sauce. Sprinkle with basil and serve immediately with sauced pasta.


There is an ATK video that shows you all the steps, which is wonderful:
ATK Chicken Parm Video


Wednesday, September 10, 2014

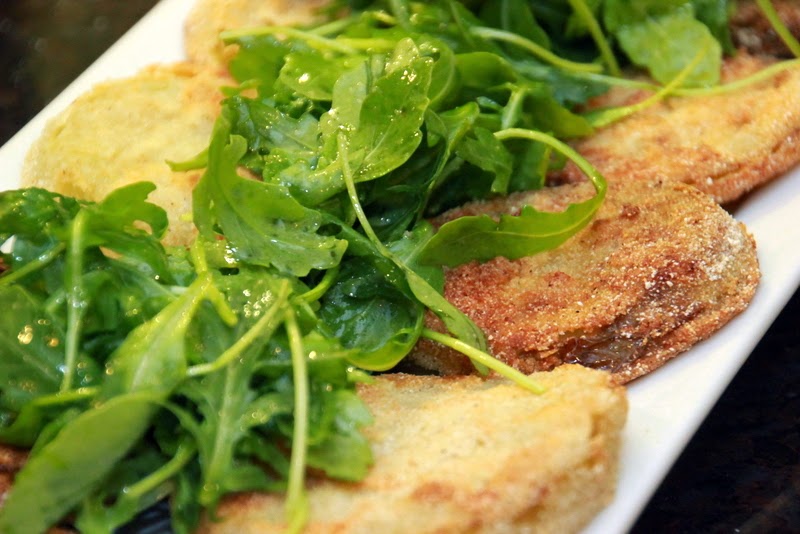
Fried Green Tomatoes with Arugula Lime Salad


What do you do when your amazing father-in-law arrives at your doorstep with a case of large, perfect, farm green tomatoes?  YOU MAKE FRIED GREEN TOMATOES, OF COURSE!  We had tried making these once before and they were not so hot - the coating burned and/or fell off.   This recipe corrects for that with the perfect combination of cornmeal and flour in the coating, and most importantly removes all the liquid from the tomatoes before cooking.

We were eating this with blackened tuna with mango salsa. In an attempt to lighten up the tomatoes and add some freshness, we added arugula salad.  It turned out to be the perfect combination of salty and fresh.

Since we still have MANY more green tomatoes left, stay tuned for more Adventures of the Green Tomatoes!

Ingredients: 

  • 1.5 lbs green tomatoes, sliced 1/4 inch thick
  • 2/3 cup cornmeal
  • 1/3 cup all-purpose flour 
  • 1 1/2 tsp salt
  • 1/2  tsp pepper
  • 1/8 tsp cayenne pepper
  • 2/3 cup buttermilk
  • 1 large egg
  • 2 cups peanut, vegetable, or canola oil

Directions:

  1. Line a rimmed backing sheet with paper towels.  Place tomato slices on top and cover with another lay of paper towels.  Let sit for 20 minutes.  Press forcefully on tomatoes to get all the moisture out.
  2. Process 1/3 cup of the cornmeal in a food processor until very finely ground (about 1-2 minutes). Combine processed cornmeal with the rest of the dry ingredients - remaining cornmeal, flour, salt, pepper, and cayenne pepper in a show dish.  Mix well.  
  3. Whisk buttermilk and egg together in a shallow dish.
  4. Dip each tomato slice in the buttermilk mixture and then dredge in cornmeal mixture, pressing firmly to adhere.  Transfer to clean backing sheet or plate.  Prepare another backing sheet with wire rack to use for 
  5. Heat oil in a 12 inch skillet over medium-high heat until 350 degrees.  Fry tomato slices in batches. Fry each tomato 2-3 minutes per side, until golden brown.  Then transfer to wire rack.  Bring oil back to 350 and fry remaining tomatoes.
  6. Serve! Or Top with Arugula Salad like we did and then Serve!
** We felt like the fried tomatoes needed some freshness and acid to brighten them up.  So, we topped them with a simple arugula salad consisting of arugula and lime dressing. Mr S. whipped up a quick and tasty lime dressing:  

1/4 cup olive oil
3 tablespoons lime juice
1/16 tsp garlic powder
1/8 tsp onion powder
1/8 tsp black pepper
1/8 tsp salt (more to taste)


Blackened Tuna

A couple months ago, we posted the recipe for blackened grilled mahi mahi with mango salsa.  Two nights ago, we made Blackened Tuna with the same salsa.  In our opinion, it was way better than the mahi mahi.  We posted the picture on social media and a few people asked for the recipe.  So, here's a short recipe.

Refer to Blackened Mahi to get the recipe for the mango salsa and the recipe for the blackening seasoning. When we made the blackened Mahi, we used a grill pan.  While that was fine, we definitely now believe that blackened anything is better done in a skillet.

We have discovered that Sam's Club has great prices on wild tuna steaks.  They sell it in a pre-portioned bag with each piece individually frozen.  It's perfect when cooking for a group of any size because you can take out the exact amount you need, and don't end up wasting anything.

Ingredients:
Tuna Steaks (ours were  1/2 inch thick)
Blackening Seasoning
Mango Salsa
2-4 tablespoons Canola or Vegetable oil

Directions:
Rub fish generously on all sides with the blackened seasoning.  Let sit for 10-15 minutes.

Heat stainless skillet to medium high. Add 2 tablespoons of oil and heat until oil start to shimmer.  Add tuna steaks to the skillet and cook for 2-3 minutes. Flip the Steaks and cook for another 1-2 minutes.

Top with mango salsa and serve immediately.  We didn't have any peppers, so our salsa consisted of just mango, cucumber, and onion, and it was still delicious.  Something I have learned from Mr. S (who is amazing at utilizing the ingredients we have) - if you don't have everything, improvise!  Turns out, some of our best recipes have actually come about that way.

NOTE:  The cooking time is HIGHLY dependent on desired doneness and the thickness of the fish you are using.  We cooked ours about 2.5 minutes on the first side and another min on the second for a medium done tuna.  Next time, we will probably cook it a little less.

Last, but certainly not least:  I have to give a shout out to Mr. S!  Didn't he take some amazing shots of our food???  After a whirlwind year and a half of engagement, marriage, honeymooning, and settling into our lives and newlyweds, we have finally returned to one of our favorite mutual hobbies (besides cooking of course), photography!  More photos to come from Mr. and Mrs. S!


Friday, September 5, 2014

The ONLY Sunny Side Up Eggs Recipe You Will Ever Need


Mr. S. and I are absolutely fans of breakfast.  We used to go out for breakfast on the weekends often (and sometimes still do). But over the past year, we've accumulated so many go-to recipes for breakfast classics, that it often makes more sense to stay home - from the wallet standpoint, the knowing what's in our food standpoint, and the taste standpoint!


Several months ago, we stumbled upon this America's Test Kitchen recipe for sunny-side-up eggs/fried eggs, and let me tell you my friends, it has been life-changing.  We discovered that you can make PERFECTLY cooked, PERFECTLY runny (depending on preference) fried eggs in about 2 minutes.  Once you try this recipe, you will never go back to the  insanity of trying to get the yellow of the egg done without overcooking the white!

Perfect Sunny Side Up Eggs (serves 2 - with 2 eggs each)

Ingredients
2 tsp canola (or vegetable) oil
4 large eggs
Salt and pepper
2 tsp unsalted butter

Directions:
  • Heat oil in 12-inch nonstick skillet on low for 5 minutes.  
  • Crack 2 eggs into a mug or small bowl.  Crack the other two eggs into a separate bowl/mug.  Season with salt and pepper
  • Increase heat to medium-high until oil is shimmering.  Add butter and swirl to coat pan. 
  • Simultaneously pour both bowls of eggs into the pan.
  • Cover and let cook for 1 minute.  
  • Remove skillet from the burner and let stand, covered 15 to 60 second, depending on preferred doneness (we do 30 seconds for perfectly runny eggs).


Source:  America's Test Kitchen