Thursday, October 9, 2014

Chicken Satay Chopped Salad


With Thai Butternut Soup simmering on the stove top, and the smell of curry, lime, and thai basil filling our house, we wanted to find a salad to compliment the soup.  After looking through many recipes online, but not finding anything quite right, we decided to concoct our own, using elements of recipes we'd seen.  Below, is what we came up with, a salad with a skewer of chicken satay, and a sesame lime dressing.  This could definitely be a meal on it's own, but, combined with the butternut soup, made a fantastic soup and salad dinner combo.

Ingredients

Chicken Satay
1/2 can of coconut milk
zest from 1 lime
1/4 cup peanut butter
2 tsp minced garlic
2 tsp minced ginger
1/2 tablespoon soy sauce
1 tablespoon sweet thai chili sauce
1 pound chicken breasts, cut into one inch pieces
wooden skewers 

Salad
2 cups organic baby mixed field greens
1 cup chopped cabbage (purple is great for color)
1/2 small red onion finely sliced
2 carrots chopped
1 red pepper, chopped
2 cucumbers, chopped
3-4 tablespoons of fresh chopped thai herbs - we used thai basil and cilantro
1/4 cup peanuts, chopped/crushed

Dressing
3 tablespoons lime juice
2 tablespoons fish sauce
1 tablespoon brown sugar
1 tablespoon chopped cilantro
1 teaspoon sesame oil
1/2 inch piece of ginger, grated
1/2 clove of garlic, minced
Sriracha or red paper flakes to taste (optional)

Directions:
Make marinade for the chicken satay (coconut milk, lime zest, garlic, ginger, soy sauce, and sweet thai chili).  Mix well.  Add chicken pieces and marinate for at least 30 minutes, 1-2 hours if possible.  Place marinated chicken pieces on wooden skewers and grill until cooked through.  Be sure to oil your grill grates and watch chicken carefully, as it has a tendency to stick.

Combine ingredients for the dressing in a small food processor.

Mix the cabbage and field greens together to form the base of the salad.  For beautiful presentation,  arrange the colorful chopped vegetables in sections around the salad.  Add peanuts and fresh herbs.  Put the skewers of chicken satay on top.

Serve with dressing, extra peanuts, lime wedges and cilantro.  Or like us, serve a small salad with the bowl of thai butternut soup!


Wednesday, October 8, 2014

Thai Butternut Squash, Sweet Potato, Carrot Soup

Fall is, by far, our favorite time of the year - cool weather, nights by the fire pit, apple cider, and the beginning of fall/winter comfort food.  Butternut squash soup has always been a fall favorite of mine, and when Mr. S brought home some butternut squash from a local farm, I knew I had to make some.  As much as I love traditional butternut soup with cinnamon and nutmeg, we wanted to try something new!  A long time ago, I came across a recipe for Thai Butternut Soup on Pinterest, and have been waiting for butternut season to give it a whirl.  I'm not sure what we were expecting, exactly, but we couldn't get over how delicious this recipe turned out.  Not only was it super flavorful, it was healthy, filling, and beautiful! 
Thai Butternut Squash, Sweet Potato, Carrot Soup

Ingredients:
  • 2 tablespoons olive oil (can use coconut or canola)
  • 1 sweet onion, diced
  • 1/4 cup Thai Kitchen red curry paste (more at the end to taste)
  • 1/4 teaspoon red pepper flakes (optional)
  • 1 tablespoon freshly grated ginger
  • 5 garlic cloves, minced
  • 6-7 cups uncooked butternut squash, peeled, cut into 1”cubes, seeds separated
  • 1 large sweet potato, peeled, cut into 1”cubes
  • 3 medium carrots, peeled and chopped
  • 4 cups chicken or vegetable stock
  • 1 teaspoon salt
  • 1/2 teaspoon pepper
  • 1 (14 oz.) can Thai Kitchen coconut milk (we used light)
  • 2 tablespoons fish sauce
  • 1 tablespoon finely chopped Thai basic
  • 2 tablespoons lime juice
  • Sriracha/Asian hot chili sauce to taste (optional)

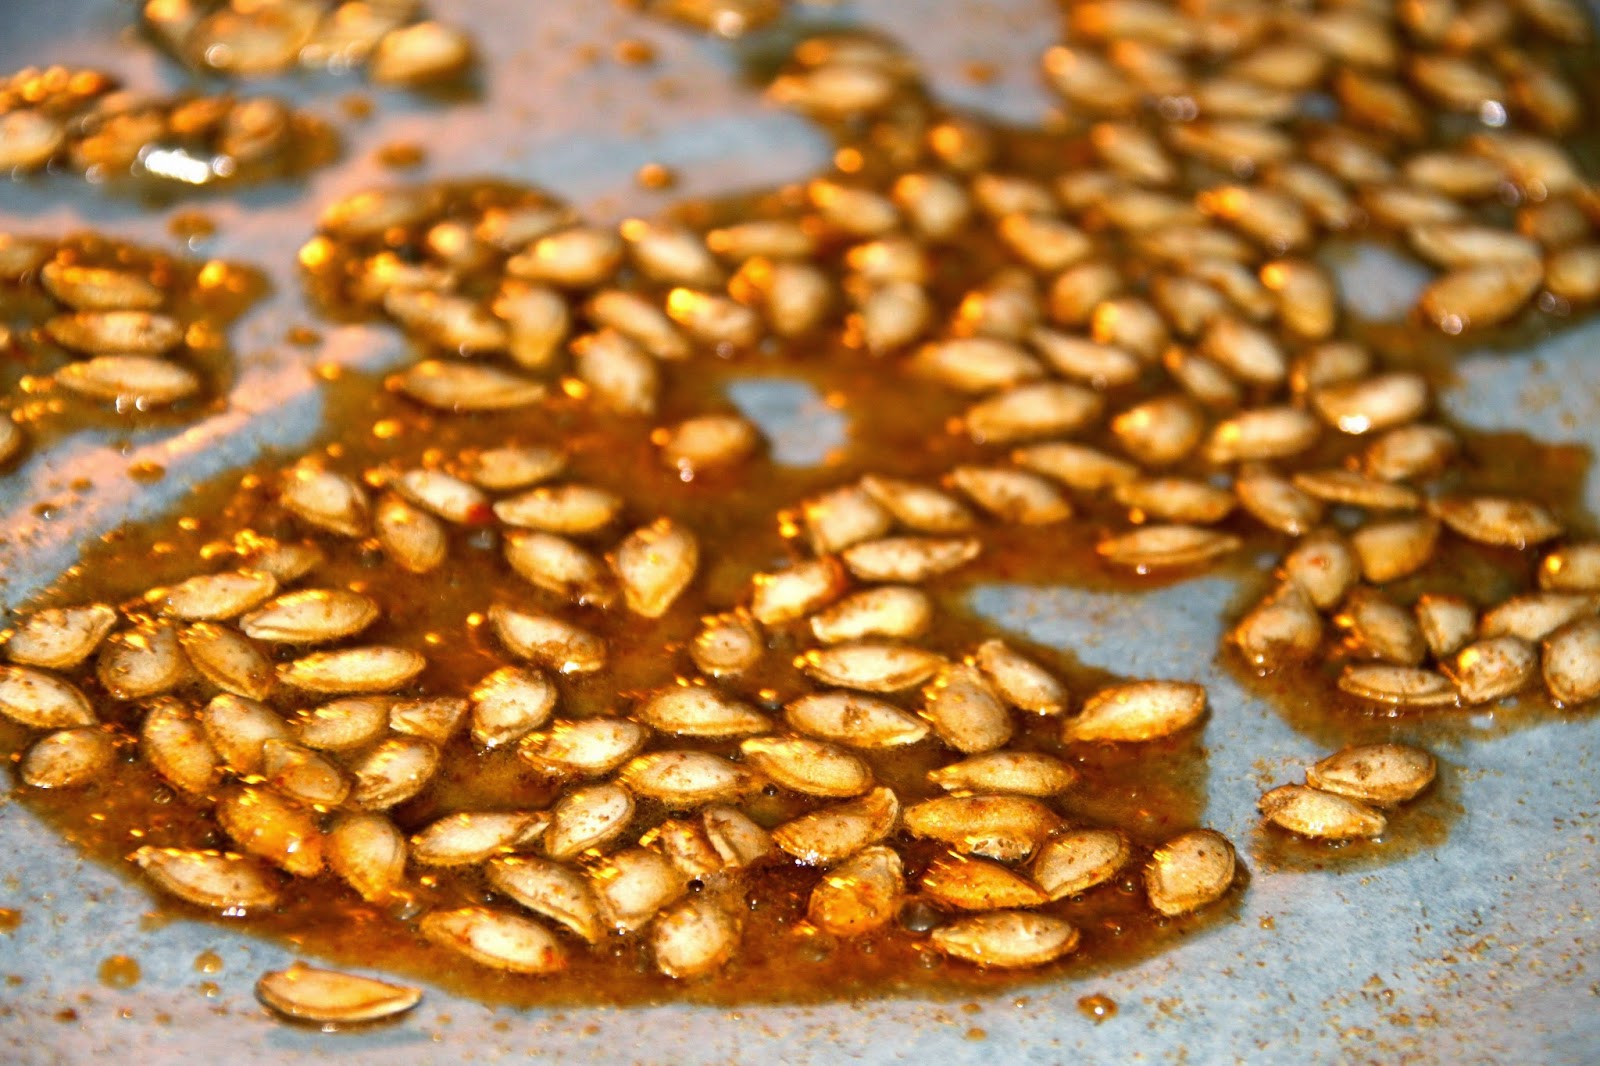
    Honey Sriracha Butternut Squash Seeds
  • Reserved butternut squash seeds
  • 1 tablespoon honey
  • 1/2 teaspoon coconut oil
  • 1/2 teaspoon Sriracha/Asian hot chili sauce
  • 1/2 teaspoon salt
  • 1/4 teaspoon McCormick ground cumin

    Garnish
  • Freshly squeezed lime juice
  • 1/2 cup cilantro, roughly chopped (optional)
  • Sriacha hot chili sauce
Directions:
  1. Preheat oven to 300 degrees. Line a baking tray with parchment paper. Rinse squash seeds and pat dry. In a small bowl, whisk together honey, Srirach, oil, salt, and cumin; add seeds and stir until evenly coated. Spread seeds out evenly on baking sheet in a single layer. Cook for 15-20 min (watch closely so they won't burn).
  2. Meanwhile, heat oil over medium heat in a dutch oven. When oil is hot, add, onions and sauté until onions are soft, about 3 - 5 minutes. Add red curry paste, red pepper flakes, ginger and garlic; stir to combine with onions; saute for 3 minutes. Add squash, sweet potatoes, carrots and chicken stock. Season with 1 teaspoon salt, and ½ teaspoon pepper. Bring to a boil, cover, then reduce heat to medium. Simmer for 15-20 minutes or until vegetables are soft.
  3. Pour  vegetable mixture into blender/food processor (you will have to do this in batches unless you have a giant blender). Puree soup in batches until it is smooth.   Return to pot, or to a new pot.  *** Make sure that your blender is properly vented so it doesn't explode from the heat ***
  4. Add coconut milk, fish sauce, and basil to the soup and cook until soup is heated through (2-5 minutes). When ready to server, stir in 2 tablespoons lime juice. Taste soup and add desired amount of Sriracha, salt and pepper to taste.
  5. To serve, squeeze fresh lime juice onto individual bowls for a fresh pop and garnish with roasted seeds and cilantro.

This soup is very filling.  So, a couple bowls could be a meal by itself.  But, to up the freshness factor, we decided to have it with a thai chopped salad!  Recipe to follow to soon :)


Adapted from the fabulous Carlsbad Cravings blog!

Tuesday, September 23, 2014

Crispy Chicken Parmesan


Best Chicken Parmesan

Ingredients:
1 lb. pasta
Sauce
2 tablespoons extra-virgin olive oil
2 garlic cloves , minced
Kosher salt and pepper
1/4 teaspoon dried oregano
Pinch red pepper flakes
1(28-ounce) can crushed tomatoes
1/4 teaspoon sugar
2 tablespoons coarsely chopped fresh basil
Chicken
2 (6- to 8-ounce) boneless, skinless chicken breasts , trimmed, halved horizontally, and pounded 1/2 inch thick
1 teaspoon kosher salt
2 ounces whole-milk mozzarella cheese , shredded (1/2 cup)
2 ounces fontina cheese , shredded (1/2 cup)
1 large egg
1 tablespoon all-purpose flour
1 1/2 ounces Parmesan cheese , grated (3/4 cup)
1/2 cup panko bread crumbs
1/2 teaspoon garlic powder
1/4 teaspoon dried oregano
1/4 teaspoon pepper
1/3 cup vegetable oil
1/4 cup torn fresh basil

Instructions:
FOR THE PASTA:
Bring a large pot of water to a boil for pasta.  Boil pasta according to package instructions

FOR THE SAUCE:
1. Heat 1 tablespoon oil in medium saucepan over medium heat until just shimmering. Add garlic, ¾ teaspoon salt, oregano, and pepper flakes; cook, stirring occasionally, until fragrant (I find this happens very, very quickly, about 15 seconds). Stir in tomatoes and sugar; increase heat to high and bring to simmer. Reduce heat to medium-low and simmer until thickened, about 20 minutes. Off heat, stir in basil and remaining 1 tablespoon oil; season with salt and pepper to taste. Cover and keep warm. You will want to reserve 1/2 cup of the sauce to spoon over cutlets in the end; the rest will sauce the pasta.

NOTE:  As I've said many times before, we are HUGE fans of Don Pepino Pizza Sauce.  It comes in a yellow can and is magicalIf you don't want to make the sauce, use a can or two of Don Pepino.  You won't be sorry!

FOR THE CHICKEN:
2. Sprinkle each side of each cutlet with 1/8 teaspoon salt and let stand at room temperature for 20 minutes. Combine mozzarella and fontina in bowl; set aside.
3. Adjust oven rack 4 inches from broiler element (this is the top rack in my oven) and heat broiler. Whisk egg and flour together in shallow dish or pie plate until smooth. Toss together Parmesan, panko, garlic powder, oregano, and pepper in second shallow dish or pie plate. Pat chicken dry with paper towels. Dredge cutlets, one at a time, in egg mixture, allowing excess to drip off. Coat all sides in Parmesan mixture, pressing gently so crumbs adhere. Transfer cutlet to large plate and repeat with remaining cutlets.
4. Add 2 tablespoons salt to boiling pasta water, cook, and drain pasta.
5. Heat vegetable oil in 10-inch nonstick skillet over medium-high heat until shimmering. Carefully place 2 cutlets in skillet and cook without moving them until bottoms are crispy and deep golden brown, 1½ to 2 minutes. Using tongs, carefully flip cutlets and cook on second side until deep golden brown, 1½ to 2 minutes. Transfer cutlets to paper towel–lined plate and repeat with remaining cutlets.
6. Place cutlets on rimmed baking sheet and sprinkle cheese mixture evenly over cutlets, covering as much surface area as possible. Broil until cheese is melted and beginning to brown, 2 to 4 minutes, rotating baking sheet as necessary for even browning. Transfer chicken to serving platter and top each cutlet with 2 tablespoons sauce. Sprinkle with basil and serve immediately with sauced pasta.


There is an ATK video that shows you all the steps, which is wonderful:
ATK Chicken Parm Video


Wednesday, September 10, 2014

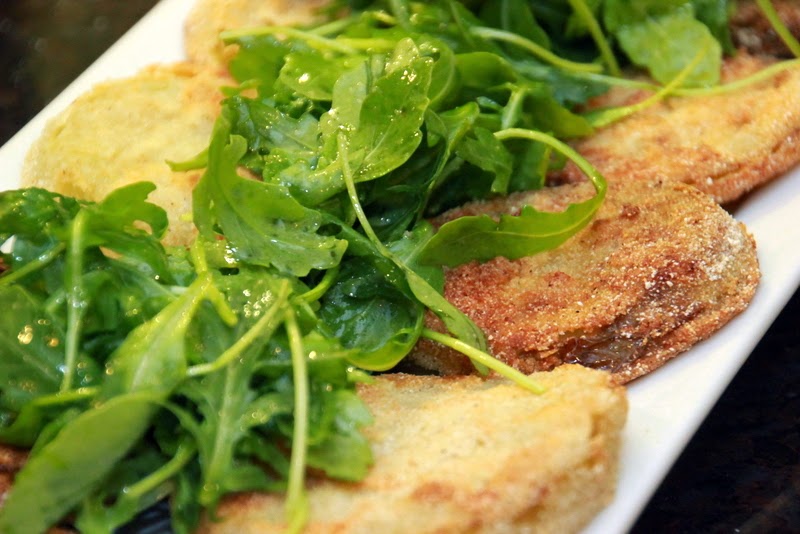
Fried Green Tomatoes with Arugula Lime Salad


What do you do when your amazing father-in-law arrives at your doorstep with a case of large, perfect, farm green tomatoes?  YOU MAKE FRIED GREEN TOMATOES, OF COURSE!  We had tried making these once before and they were not so hot - the coating burned and/or fell off.   This recipe corrects for that with the perfect combination of cornmeal and flour in the coating, and most importantly removes all the liquid from the tomatoes before cooking.

We were eating this with blackened tuna with mango salsa. In an attempt to lighten up the tomatoes and add some freshness, we added arugula salad.  It turned out to be the perfect combination of salty and fresh.

Since we still have MANY more green tomatoes left, stay tuned for more Adventures of the Green Tomatoes!

Ingredients

  • 1.5 lbs green tomatoes, sliced 1/4 inch thick
  • 2/3 cup cornmeal
  • 1/3 cup all-purpose flour 
  • 1 1/2 tsp salt
  • 1/2  tsp pepper
  • 1/8 tsp cayenne pepper
  • 2/3 cup buttermilk
  • 1 large egg
  • 2 cups peanut, vegetable, or canola oil

Directions:

  1. Line a rimmed backing sheet with paper towels.  Place tomato slices on top and cover with another lay of paper towels.  Let sit for 20 minutes.  Press forcefully on tomatoes to get all the moisture out.
  2. Process 1/3 cup of the cornmeal in a food processor until very finely ground (about 1-2 minutes). Combine processed cornmeal with the rest of the dry ingredients - remaining cornmeal, flour, salt, pepper, and cayenne pepper in a show dish.  Mix well.  
  3. Whisk buttermilk and egg together in a shallow dish.
  4. Dip each tomato slice in the buttermilk mixture and then dredge in cornmeal mixture, pressing firmly to adhere.  Transfer to clean backing sheet or plate.  Prepare another backing sheet with wire rack to use for 
  5. Heat oil in a 12 inch skillet over medium-high heat until 350 degrees.  Fry tomato slices in batches. Fry each tomato 2-3 minutes per side, until golden brown.  Then transfer to wire rack.  Bring oil back to 350 and fry remaining tomatoes.
  6. Serve! Or Top with Arugula Salad like we did and then Serve!
** We felt like the fried tomatoes needed some freshness and acid to brighten them up.  So, we topped them with a simple arugula salad consisting of arugula and lime dressing. Mr S. whipped up a quick and tasty lime dressing:  

1/4 cup olive oil
3 tablespoons lime juice
1/16 tsp garlic powder
1/8 tsp onion powder
1/8 tsp black pepper
1/8 tsp salt (more to taste)


Blackened Tuna

A couple months ago, we posted the recipe for blackened grilled mahi mahi with mango salsa.  Two nights ago, we made Blackened Tuna with the same salsa.  In our opinion, it was way better than the mahi mahi.  We posted the picture on social media and a few people asked for the recipe.  So, here's a short recipe.

Refer to Blackened Mahi to get the recipe for the mango salsa and the recipe for the blackening seasoning. When we made the blackened Mahi, we used a grill pan.  While that was fine, we definitely now believe that blackened anything is better done in a skillet.

We have discovered that Sam's Club has great prices on wild tuna steaks.  They sell it in a pre-portioned bag with each piece individually frozen.  It's perfect when cooking for a group of any size because you can take out the exact amount you need, and don't end up wasting anything.

Ingredients:
Tuna Steaks (ours were  1/2 inch thick)
Blackening Seasoning
Mango Salsa
2-4 tablespoons Canola or Vegetable oil

Directions:
Rub fish generously on all sides with the blackened seasoning.  Let sit for 10-15 minutes.

Heat stainless skillet to medium high. Add 2 tablespoons of oil and heat until oil start to shimmer.  Add tuna steaks to the skillet and cook for 2-3 minutes. Flip the Steaks and cook for another 1-2 minutes.

Top with mango salsa and serve immediately.  We didn't have any peppers, so our salsa consisted of just mango, cucumber, and onion, and it was still delicious.  Something I have learned from Mr. S (who is amazing at utilizing the ingredients we have) - if you don't have everything, improvise!  Turns out, some of our best recipes have actually come about that way.

NOTE:  The cooking time is HIGHLY dependent on desired doneness and the thickness of the fish you are using.  We cooked ours about 2.5 minutes on the first side and another min on the second for a medium done tuna.  Next time, we will probably cook it a little less.

Last, but certainly not least:  I have to give a shout out to Mr. S!  Didn't he take some amazing shots of our food???  After a whirlwind year and a half of engagement, marriage, honeymooning, and settling into our lives and newlyweds, we have finally returned to one of our favorite mutual hobbies (besides cooking of course), photography!  More photos to come from Mr. and Mrs. S!


Friday, September 5, 2014

The ONLY Sunny Side Up Eggs Recipe You Will Ever Need


Mr. S. and I are absolutely fans of breakfast.  We used to go out for breakfast on the weekends often (and sometimes still do). But over the past year, we've accumulated so many go-to recipes for breakfast classics, that it often makes more sense to stay home - from the wallet standpoint, the knowing what's in our food standpoint, and the taste standpoint!


Several months ago, we stumbled upon this America's Test Kitchen recipe for sunny-side-up eggs/fried eggs, and let me tell you my friends, it has been life-changing.  We discovered that you can make PERFECTLY cooked, PERFECTLY runny (depending on preference) fried eggs in about 2 minutes.  Once you try this recipe, you will never go back to the  insanity of trying to get the yellow of the egg done without overcooking the white!

Perfect Sunny Side Up Eggs (serves 2 - with 2 eggs each)

Ingredients
2 tsp canola (or vegetable) oil
4 large eggs
Salt and pepper
2 tsp unsalted butter

Directions:
  • Heat oil in 12-inch nonstick skillet on low for 5 minutes.  
  • Crack 2 eggs into a mug or small bowl.  Crack the other two eggs into a separate bowl/mug.  Season with salt and pepper
  • Increase heat to medium-high until oil is shimmering.  Add butter and swirl to coat pan. 
  • Simultaneously pour both bowls of eggs into the pan.
  • Cover and let cook for 1 minute.  
  • Remove skillet from the burner and let stand, covered 15 to 60 second, depending on preferred doneness (we do 30 seconds for perfectly runny eggs).


Source:  America's Test Kitchen

Wednesday, July 30, 2014

Thai Peanut Chicken with Cilantro Lime Broccoli Slaw

On Monday night, I had a dinner date with a friend, butwanted to make sure Mr. S. had some dinner to eat too.  So, I went in search of crockpot recipe that I could have waiting for him when he got home.  Turned out that he didn't get home until 10:30pm because he was working super late on a big presentation.  So, we ended up eating the chicken for dinner last night.  I have a feeling it was even better the next day!
I sometimes find that crockpot recipes can be a little bland because they are cooked for such a long time. So, I think it's essential to add some freshness at the end.  Fresh herbs and a broccoli slaw were the perfect combination.  In the end, (after the lovely photo of course), we mixed it all together and made a thai rice bowl of sorts. YUM!

Thai Peanut Chicken
  • 4 boneless, skinless chicken breasts
  • 1 red pepper, diced
  • 1 white onion, chopped
  • 1/2  cup creamy peanut butter
  • 1 lime, juiced
  • 1/2 cup vegetable broth
  • 1/4 cup soy sauce
  • 1/2 tablespoon cumin
  • 1/2 tsp of red pepper flake (more if you like spicy food....or omit if you don't)
  • Chopped scallions
  • Crushed peanuts
  • Cilantro
  • Rice, rice noodles, etc (to serve it on)
  • Lime wedges for squeezing on top
Place chicken in the base of crock pot. Top with red pepper and onion.
In a bowl, mix together peanut butter, lime juice, vegetable broth, soy sauce, and cumin. Pour sauce over chicken.  Cook on low for 3-4 hours. 
Remove chicken from slow cooker and cut/shred into bit sized pieces.  Return to the sauce and mix.  
Scoop chicken and sauce over rice (we had jasmine rice) and top with scallions, peanuts, and cilantro. Squeeze some fresh lime juice over it.

Cilantro Lime Broccoli Slaw
  • 2 12 oz bags of broccoli slaw  (or use 1 and half the dressing recipe)
  • 1/4 cup fresh lime juice
  • 1/4 cup olive oil
  • 2 Tbsp honey
  • 3 Tbsp chopped cilantro
  • 1 clove garlic, minced
  • 1 tsp salt
  • 1/2 tsp cumin
  • 1/2 tsp chili powder (we used Mexican for some kick)
  • 1 tsp diced jalapeno (if desired)

    Combine all ingredients (except broccoli slaw) in a small food processor (or shake together).  Add additional salt, cilantro, and spices to taste. Toss with broccoli slaw.


Monday, July 21, 2014

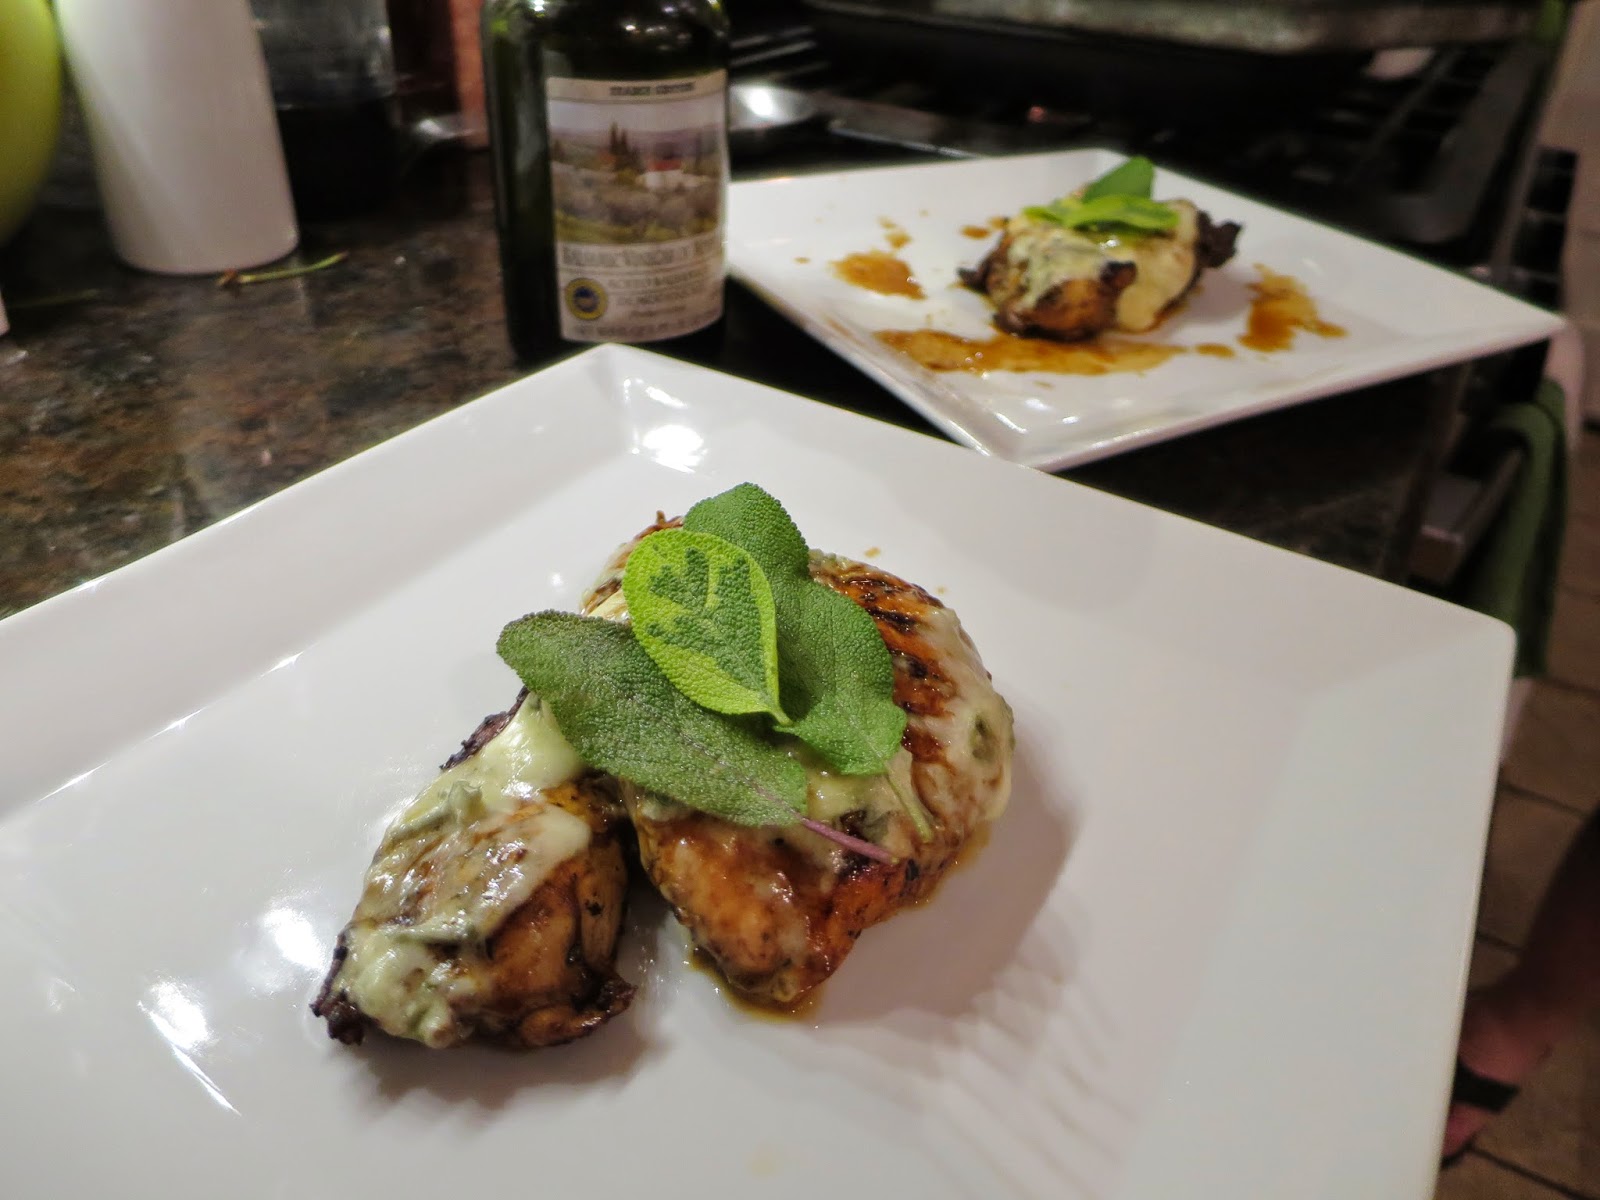
Blue Cheese Balsamic Grilled Chicken

Mr. S and I are always in search of new and creative ways to cook boneless skinless chicken breasts.  Before that fateful day when I came into his life, Mr. S. much preferred chicken thighs or legs...but he's been a good sport, indulging me and my hatred of dark meat chicken.  So, I am constantly looking recipes that make these sometimes dry and tasteless chicken pieces into something tasty.  This recipe is both TASTY and EASY!

Ingredients
  • 3 skinless boneless chicken breast halves (5 to 6 ounces each)
  • 3 Tablespoons balsamic vinegar
  • 1 Tablespoons olive oil
  • 1 teaspoons coarse kosher salt, divided
  • 1/2 teaspoon freshly ground black pepper
  • 2 teaspoons McCormick Gourmet Herbes de Provence
  • 1 3-to 4-ounce wedge blue cheese, cut into 1/4 to 1/2 inch 6 slices

Preparation

Preheat oven to 350.

Whisk together balsamic vinegar, olive oil, 1 tsp herbes de Provence. salt, pepper in small bowl.  Pour into resealable plastic bag.  Pound chicken breasts with a mallet until about 1/2 inch thick (here are directions on how to pound chicken breasts if you are not already familiar: http://www.wikihow.com/Pound-Chicken-Into-Cutlets).  Add to chicken; seal bag. Chill 2-3 hours, turning bag occasionally.

 Chicken can be cooked on an out door grill or on a grill pan.  We cooked ours inside since there was a huge thunderstorm going on at the time.  Heat grill pan to medium high.  Place chicken in grill pan and sprinkle with remaining herbs de Provence and a little salt and pepper (to taste).  Cook 4-5 minutes per side.  Chicken will be nearly cooked, but still slightly undercooked.

To finish them off, place chicken breasts on a foil-lined baking sheet.  Top with blue cheese slices and bake for 3-5 minutes, or until the cheese is fully melted and chicken registers 160 with meat thermometer.  (melting of cheese can also be done outside on the BBQ if desired).

Serve immediately!  We served it with a green salad with blue cheese and strawberry balsamic vinaigrette.

Adapted from Epicurious

Wednesday, July 9, 2014

Grilled Steak, Berry Balsamic Vinaigrette, and Blue Cheese Salad

With the arrival of summer has come A LOT of outdoor grilling in our house.  Many of our meals consist of some sort of grilled meat or seafood and a bunch of grilled veggies (recipes to come).   Since Mr. S buys his lunch at his work cafeteria, the leftover grilled meat usually becomes my tasty lunch!

Last night, Mr. S grilled EXTREMELY tasty t-bone steaks for dinner.  We also whipped up a tasty berry balsamic vinaigrette, that I knew would find it's way to my plate for a repeat today.  The salad is easy, tasty, and a perfect way to use up leftover grilled steak (or chicken)...and use some of the deliciousness harvested from your garden.

I'm also sharing a secret for perfectly cooked sweet corn.  Mr. S truly thought I was crazy the first time I let him in on this little trick.  But now that he knows he can have a perfectly cooked, juicy, piece of corn in under 5 minutes, he's come around.

Salad Ingredients  (makes 2 dinner salads)
1 head of romaine lettuce (red lettuce, or favorite variety), chopped into bite sized pieces
1-2 (depending on preference) ears of sweet corn, cook, and cut from cobb (see instructions below)
10 cup cherry tomatoes, cut in half
1 cucumber chopped into bite sized pieces
1/4 cup thinly sliced red onion
1/8 cup blue cheese crumbles (or more if you love cheese like us!)
8-10 oz. of grilled steak, sliced thinly against the grain

Put lettuce, tomatoes, corn, cucumber in a bowl and toss.  Top with corn, blue cheese, and steak.  Drizzle with berry balsamic dressing.

Power Berry Balsamic Vinaigrette
3 Tablespoons Trader Joe's Organic Super Fruit Jam (or any fruity jam) (more if you want it sweeter)
4 Tablespoons of Extra Virgin Olive Oil
2 Tablespoons of Balsamic Vinegar
1 clove garlic, minced
1/8 teaspoon onion power
1/8 teaspoon salt
1/8 teaspoon black pepper
sprinkles of mexican chilli powder (if you want it to have a kick)

Place all ingredients in a a mini food processor and pulse for one to two minutes.  Taste, and add more seasonings to taste.  If you want it sweeter, you might need to add more jam (depending on what kind you are using).  Additional salt might also be necessary.

Quick, Easy, Perfectly Cooked Sweet Corn
Place corn IN HUSK in the microwave.  Microwave on high for 2 minutes. Flip the ear and microwave another two minutes.  If cooking 2 or 3 ears, microwave 3 minutes, flip and microwave another 2 minutes.  Let corn cool in the husk for about a minutes.  Peel off the husk an serve immediately.  **Be careful when peeling off husk and corn is likely to be quite hot still**

Thursday, July 3, 2014

Balsamic Tomato Bruschetta

We picked up a bunch of tomatoes from the farmer's market this week, and wanted to figure out a way to use them up.  I have a feeling, with the MANY tomatoes and green/purple basil currently growing in our garden, we will be making this recipe many times this summer!  I'm looking forward to evenings of bruschetta and wine on the deck.


2 cups chopped tomatoes
1/3 cup  fresh basil, chopped into thin ribbons (we used green and purple from our garden)
1/4 cup shredded Parmesan cheese (more for sprinkling if desired)
2 cloves garlic, minced
1 teaspoon balsamic vinegar
1 tablespoon olive oil (plus more for drizzling)
1/4 teaspoon kosher salt
1/4 teaspoon freshly ground black
pepper
1-2 baguettes sliced into 3/4 to 1 inch rounds (or a loaf of French bread) - amount depends on how much
 
In a bowl, toss together the tomatoes, basil, parmesan cheese, and garlic.  Mix the balsamic vinegar, olive oil, salt, and pepper in a jar and shake until well combined.  Toss the tomato mixture with the dressing.  
 
Toast bread rounds and drizzle with some olive oil while still hot.  Top with tomato mixture sprinkle with a little extra grated parmesan if desired.


Friday, June 27, 2014

Blackened Mahi Mahi with Mango Salsa

It's been a long time since we have posted to the blog - I guess we'll chalk that up to the busy days of summer....and the fact that we've been doing a long of grilling/salads to prevent heating up the house!  Although we have been using spices and lettuce from our garden for quite a while, we are eagerly awaiting the arrival of tomatoes, cucumbers, eggplants, and peppers....and can't wait to
use them in new recipes.

As with many recipes/foods....this recipe is more than just tasty...it has the ability to transport us to some of our happiest days....our honeymoon in Tortola (BVI).  While we were on Tortola, we ate LOTS of fresh fish, including Mahi with mango salsa.  We recently revisited these memories when we took our dad out to a Caribbean inspired fish restaurant for Father's Day, but, until now, had never tried to recreate the dish at home.  I'm happy to say it turned out wonderfully, and we will definitely be making it again!

Blackened Seasoning 
1 tablespoon paprika
4 teaspoons dried thyme
2 teaspoons onion powder
2 teaspoons garlic powder
1 tablespoon white sugar
2 teaspoons salt
1 1/2 teaspoons black pepper
1 teaspoon cayenne pepper, or to taste
1 teaspoon dried oregano
1/2 teaspoon ground nutmeg
3/4 teaspoon ground cumin

In a small jar with a lid, combine the paprika, thyme, onion powder, garlic powder, sugar, salt, pepper, cayenne pepper, oregano, and cumin. Seal securely and shake to blend. Store in a cool dry place. Shake jar before each use.

If you would rather, you can buy Blackened Seasoning - we recommend Zataran's.  We decided to make our own from some of our favorite McCormick spices.

Mango Salsa
1 1/2 mangoes, peeled and diced
1/2 cup peeled, diced cucumber
1 tablespoon finely chopped jalapeno
1/3 cup diced red onion
2 kiwis, peeled and diced
1/2 large red bell pepper diced
1 tablespoon lime juice
1/3 cup roughly chopped cilantro leaves
Salt and pepper to tastes
Combine all mangoes, cucumber, jalepeno, onion, kiwi, red bell pepper, and cilantro in a bowl.  Toss with lime juice and add salt and pepper to taste.

Blackened Mahi Mahi
Rub fish generously on all sides with the blackened seasoning.  Let sit for 10-15 minutes.  Fish can be grilled on the BBQ, cooked on a grill man inside, or cooked in a frying pan.  It really depends on your preference and whether you want the entire fish to get truly "blackened" or are content with "blackened grill marks"

It was super hot outside, so we decided to cook the fish in our grill pan.  Heat the grill pan to medium high.  Don't forget to oil the grates with canola or vegetable oil.  Grill the fish for 4 minutes on the first side, then flip and grill for another 3 minutes.  Our pieces were rather thick and we didn't want them to burn or get dry.  So, we finished them off in our toaster oven for 3-4 minutes on bake (350 degrees).

Serve mango salsa on top of mahi mahi.


Friday, May 30, 2014

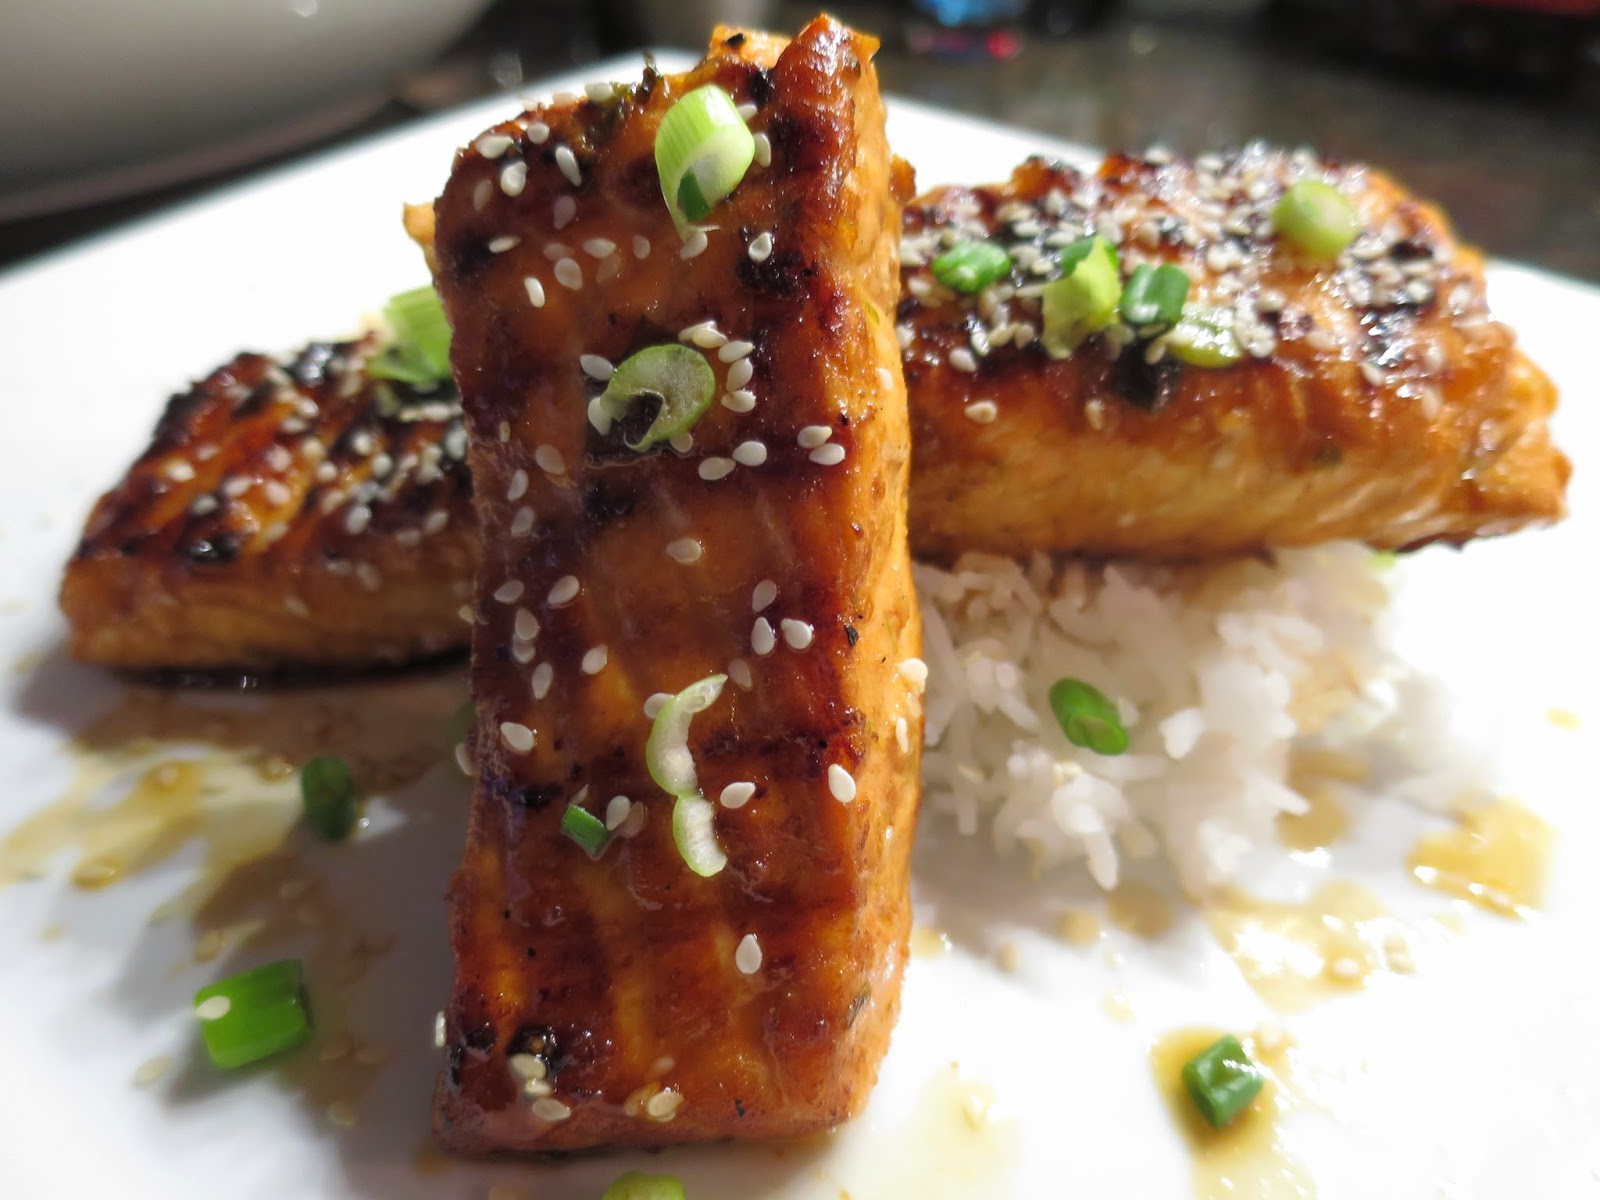
Asian Grilled Salmon


Salmon is an easy, quick, and healthy weeknight go-to in our house.  It's one of our favorite things to make in our grill pan, and now that it's finally grilling season again, we will likely be moving this recipe outside next time!  

Because we both love salmon (and really pretty much all fish), we are always looking for new recipes.  This one came about because I really wanted to have salad with ginger dressing for dinner and needed something to go with it. We served our fish on some organic jasmine rice, with the salad on the side.

Salmon Marinade Ingredients


1/4 cup olive oil
2 tablespoons soy sauce
2 tablespoons rice vinegar
2 tablespoons sesame oil
2 tablespoons brown sugar
2 cloves garlic, pressed
1 tablespoon grated fresh ginger*
1 tablespoon sesame seeds
4 green onions, thinly sliced (reserve 1 green onion for topping)
4 salmon filets

Honey Glaze Ingredients
2 tablespoons honey
1 teaspoon soy sauce
1 teaspoon sesame oil
1/2 teaspoon Sriracha, (optional - we didn't use it)
1/2 teaspoon grated fresh ginger* 
1/2 teaspoon sesame seeds

(*Note: much better with fresh ginger, but you can use powdered if you don't have access to fresh)

Instructions
  • To make the glaze, whisk together honey, soy sauce, sesame oil, Sriracha, ginger and sesame seeds in a small bowl; set aside.
  • In a medium bowl, whisk together olive oil, soy sauce, rice vinegar, sesame oil, brown sugar, garlic, ginger, sesame seeds and green onions.
  • In a large Ziploc bag combine marinade and salmon filets; marinate for at least 30 minutes to overnight, turning the bag occasionally We did about 30 minutes and it was great.
  • Heat a grill pan on medium low.  Cook the Salmon about 3 minutes on either side, or until fish flakes easily (cooking time depends on the thickness of the piece....our cooked about 7 minutes total).  You can also use a BBQ grill.
  • When fish is done, brush with honey glaze
  • Sprinkle with sesame seeds and green onions.
 Adapted from Damn Delicious

Wednesday, May 21, 2014

Apple and Sage Pork Chops


Ingredients:
1 tablespoon flour
1 teaspoon salt
1 1/2 teaspoons rubbed sage
1 teaspoon minced garlic
1 teaspoon thyme
1/2 teaspoon ground allspice
1/2 teaspoon paprika
4 boneless pork chops, about 1 inch thick (1 1/4 lbs)
2 tablespoons olive oil
1 medium onion, thinly sliced
2 apples, thinly sliced
1/2 cup apple juice or 1/2 cup cider  (more if you want more sauce)
1 tablespoon brown sugar

Directions:
Mix flour, all of the spices and salt (if using) in small bowl. Sprinkle both sides of pork chops with 1 tablespoon of the seasoned flour.
Cook pork chops in hot oil in large skillet on medium-high heat until browned on both sides. Remove from skillet.

Add onion to skillet; cook and stir 3 minutes or until tender.
Add apples; cook and stir 2 minutes.

Stir in juice or cider, sugar and remaining seasoned flour until well mixed.

Return pork chops to skillet.

Bring to a boil. Reduce heat to low; cover and simmer 5 minutes or until desired doneness.

Friday, May 16, 2014

Greek Orzo Salad with Red Wine Vinaigrette

We planted our garden several weeks ago, and this year we made an effort to include lots of herbs to use in our cooking.  When I was watering the garden yesterday, I noticed how amazing the purple basil and mint looked and tried to think up a way to use them in our dinner.  Fast forward a few minutes and, I had retrieved mint, purple basil, italian basil, swiss chard, and chives from our garden and was searching through the pantry and fridge to figure out what to do with them!   Once I found some orzo, it was a match made in tastebud heaven.

We served the orzo salad with grilled chicken tenders on top to add some protein and cut down on the amount of pasta we were eating.  Adding garbanzo beans to the salad is a vegetarian option for adding protein.
 

 Orzo Salad
  • 1 cup orzo pasta (about 1/2 a box)
  • 1 1/2 cups grape tomatoes or grape tomatoes, halved
  • 1/4 cup finely chopped red onion
  • 1/2 cup chopped fresh basil leaves
  • 1/4 cup chopped fresh mint leaves
  • 1/2 cup chopped spinach (we used swiss chard)
  • 1 Tbsp capers 
  • 1 Tbsp of finely chopped chives
  • 3 Tbsp crumbled feta cheese (optional)
  • 3-4 Tbsp red wine vinaigrette (adjust the quantity to your taste; we used the recipe below)
  • Salt and freshly ground black pepper (to taste)


Red Wine Vinaigrette:
(makes about 1 cup)
  • 1/4 cup red wine vinegar
  • 1/4 cup fresh lemon juice
  • 1 Tbs honey
  • 1 tsp salt
  • 1/2 teaspoon freshly ground black pepper
  • 1/2 cup extra-virgin olive oil
  •  
     

Cook 1 cup orzo as directed on package (add orzo to 3qts water and 2 tsp salt; boil for 10 minutes). While orzo is cooking, chop tomatoes, spinach, and herbs, and place them in a bowl.   Make vinaigrette as directed (recipe above makes WAY more than you need for this salad).

Once orzo is done, drain and allow to cool to room temperature, toss in bowl with tomatoes, spinach, and herbs. Add dressing and toss until coated.

We served it with grilled lemon garlic chicken tenders with a little feta on top.   It's a perfect side dish for a BBQ....or even as a meal.


Recipe based on:  Giada De Laurentis' Orzo Salad recipe